
| 일 | 월 | 화 | 수 | 목 | 금 | 토 |
|---|---|---|---|---|---|---|
| 1 | 2 | 3 | 4 | 5 | 6 | 7 |
| 8 | 9 | 10 | 11 | 12 | 13 | 14 |
| 15 | 16 | 17 | 18 | 19 | 20 | 21 |
| 22 | 23 | 24 | 25 | 26 | 27 | 28 |
- carousel indicator
- render target2d
- kanban
- IntersectionObserver
- page dot
- HLSL
- JavaScript
- visual studio integration tool 상태
- unreal niagara with compute shader
- Compute Shader
- Game Developement
- jquery
- scroll-snap
- unreal compute shader
- niagara.pdb 로드되지 않음
- unreal visual studio
- League of Legend
- FRunnableThread
- Unreal
- unreal compute shader #unreal niagara #unreal #compute shader #unreal niagara with compute shader
- FRunnable
- HTML
- unreal niagara
- CSS
- texture render target
- Riot Games
- render target
- Agile 게임 개발
- hlsl with unreal
- unreal c++ #unreal #unreal build #unreal
- Today
- Total
Nephrite21
언리얼 유체 시뮬레이션 과정 3-2 - Shadeup을 이용한 Unreal Compute Shader 구현 및 이해 - 셰이더 실행 cpp 코드 본문
언리얼 유체 시뮬레이션 과정 3-2 - Shadeup을 이용한 Unreal Compute Shader 구현 및 이해 - 셰이더 실행 cpp 코드
Nephrite21 2024. 11. 4. 21:46Shadeup Home
SHADEUP More shaders less boilerplate Shadeup is a CLI-based scaffolding tool for rapidly whipping up shaders in Unreal Engine 1. Install $ npm i @shadeup/unreal -g 2. Generate $ cd my-unreal-engine-project $ shadeup-unreal ? Which plugin do you want to us
unreal.shadeup.dev
위 사이트에서 받아온 코드 분석 2번째입니다.
가장 먼저 Public 하위의 TestShader.h 부터 살펴보겠다.
#pragma once

#include "CoreMinimal.h"
#include "GenericPlatform/GenericPlatformMisc.h"
#include "Kismet/BlueprintAsyncActionBase.h"
#include "Engine/TextureRenderTarget2D.h"
#include "Materials/MaterialRenderProxy.h"

#include "TestShader.generated.h"

struct TESTPLUGIN_API FTestShaderDispatchParams
{
	int X;
	int Y;
	int Z;


	FRenderTarget* RenderTarget;


	FTestShaderDispatchParams(int x, int y, int z)
		: X(x)
		, Y(y)
		, Z(z)
	{
	}
};

// This is a public interface that we define so outside code can invoke our compute shader.
class TESTPLUGIN_API FTestShaderInterface {
public:
	// Executes this shader on the render thread
	static void DispatchRenderThread(
		FRHICommandListImmediate& RHICmdList,
		FTestShaderDispatchParams Params
	);

	// Executes this shader on the render thread from the game thread via EnqueueRenderThreadCommand
	static void DispatchGameThread(
		FTestShaderDispatchParams Params
	)
	{
		ENQUEUE_RENDER_COMMAND(SceneDrawCompletion)(
		[Params](FRHICommandListImmediate& RHICmdList)
		{
			DispatchRenderThread(RHICmdList, Params);
		});
	}

	// Dispatches this shader. Can be called from any thread
	static void Dispatch(
		FTestShaderDispatchParams Params
	)
	{
		if (IsInRenderingThread()) {
			DispatchRenderThread(GetImmediateCommandList_ForRenderCommand(), Params);
		}else{
			DispatchGameThread(Params);
		}
	}
};

// This is a static blueprint library that can be used to invoke our compute shader from blueprints.
UCLASS()
class TESTPLUGIN_API UTestShaderLibrary : public UObject
{
	GENERATED_BODY()

public:
	UFUNCTION(BlueprintCallable)
	static void ExecuteRTComputeShader(UTextureRenderTarget2D* RT)
	{
		// Create a dispatch parameters struct and fill it the input array with our args
		FTestShaderDispatchParams Params(RT->SizeX, RT->SizeY, 1);
		Params.RenderTarget = RT->GameThread_GetRenderTargetResource();

		FTestShaderInterface::Dispatch(Params);
	}
};
뭔가 많아서 어려워 보이지만 차근히 쳐다보면 내용을 이해할 수 있다.
가장 아래에 있는 UTestShaderLibrary 클래스부터 보면 이부분이 모듈을 만들고 있다는 것을 알 수 있다.
BlueprintCallable 한 Function을 정의하고 있는데, 입력으로 Render Target을 받고 있다.
static void ExecuteRTComputeShader(UTextureRenderTarget2D* RT)
{
	// Create a dispatch parameters struct and fill it the input array with our args
	FTestShaderDispatchParams Params(RT->SizeX, RT->SizeY, 1);
	Params.RenderTarget = RT->GameThread_GetRenderTargetResource();

	FTestShaderInterface::Dispatch(Params);
}
RT의 사이즈를 받아와서 FTestShaderDispatchParams를 만들고 있는데, 해당 클래스는 위에서 정의된 간단한 클래스이다.
struct TESTPLUGIN_API FTestShaderDispatchParams
{
	int X;
	int Y;
	int Z;


	FRenderTarget* RenderTarget;


	FTestShaderDispatchParams(int x, int y, int z)
		: X(x)
		, Y(y)
		, Z(z)
	{
	}
};
그냥 RenderTarget과 사이즈를 저장하는 간단한 클래스이다.
렌더 타겟도 저장해주고 나면
FTestShaderInterface::Dispatch(Params)를 실행하는데,
이 인터페이스는 간단하게 렌더링이 스레드에 들어가있으면 실행. 아니면 큐에 등록하는 코드이다.
이를 통해서 결국 DispatchRenderThread()함수를 실행하는데, 여기서부터는 Private하위의 cpp파일에서 진행된다.
void FTestShaderInterface::DispatchRenderThread(FRHICommandListImmediate& RHICmdList, FTestShaderDispatchParams Params) {
	FRDGBuilder GraphBuilder(RHICmdList);

	{
		SCOPE_CYCLE_COUNTER(STAT_TestShader_Execute);
		DECLARE_GPU_STAT(TestShader)
		RDG_EVENT_SCOPE(GraphBuilder, "TestShader");
		RDG_GPU_STAT_SCOPE(GraphBuilder, TestShader);

		typename FTestShader::FPermutationDomain PermutationVector;

		// Add any static permutation options here
		// PermutationVector.Set<FTestShader::FMyPermutationName>(12345);

		TShaderMapRef<FTestShader> ComputeShader(GetGlobalShaderMap(GMaxRHIFeatureLevel), PermutationVector);


		bool bIsShaderValid = ComputeShader.IsValid();

		if (bIsShaderValid) {
			FTestShader::FParameters* PassParameters = GraphBuilder.AllocParameters<FTestShader::FParameters>();


			FRDGTextureDesc Desc(FRDGTextureDesc::Create2D(Params.RenderTarget->GetSizeXY(), PF_B8G8R8A8, FClearValueBinding::White, TexCreate_RenderTargetable | TexCreate_ShaderResource | TexCreate_UAV));
			FRDGTextureRef TmpTexture = GraphBuilder.CreateTexture(Desc, TEXT("TestShader_TempTexture"));
			FRDGTextureRef TargetTexture = RegisterExternalTexture(GraphBuilder, Params.RenderTarget->GetRenderTargetTexture(), TEXT("TestShader_RT"));
			PassParameters->RenderTarget = GraphBuilder.CreateUAV(TmpTexture);


			auto GroupCount = FComputeShaderUtils::GetGroupCount(FIntVector(Params.X, Params.Y, Params.Z), FComputeShaderUtils::kGolden2DGroupSize);
			GraphBuilder.AddPass(
				RDG_EVENT_NAME("ExecuteTestShader"),
				PassParameters,
				ERDGPassFlags::AsyncCompute,
				[&PassParameters, ComputeShader, GroupCount](FRHIComputeCommandList& RHICmdList)
			{
				FComputeShaderUtils::Dispatch(RHICmdList, ComputeShader, *PassParameters, GroupCount);
			});


			// The copy will fail if we don't have matching formats, let's check and make sure we do.
			if (TargetTexture->Desc.Format == PF_B8G8R8A8) {
				AddCopyTexturePass(GraphBuilder, TmpTexture, TargetTexture, FRHICopyTextureInfo());
			} else {
				#if WITH_EDITOR
					GEngine->AddOnScreenDebugMessage((uint64)42145125184, 6.f, FColor::Red, FString(TEXT("The provided render target has an incompatible format (Please change the RT format to: RGBA8).")));
				#endif
			}

		} else {
			#if WITH_EDITOR
				GEngine->AddOnScreenDebugMessage((uint64)42145125184, 6.f, FColor::Red, FString(TEXT("The compute shader has a problem.")));
			#endif

			// We exit here as we don't want to crash the game if the shader is not found or has an error.

		}
	}

	GraphBuilder.Execute();
}
전부 설명하면 너무 길어지니까 간단하게 설명하면, 셰이더의 파라미터를 전부 설정하고, 실행하되, 셰이더가 잘못되었거나 포맷이 맞지 않으면 에디터에 오류를 반환하는 코드이다.
여기서 파라미터를 전부 전달해주므로, 만약 파라미터 값을 설정해줄 필요가 있다면 bIsShaderValid 확인 아래에서 PassParameter->(파라미터) 를 통해서 파라미터에 값을 전달해줄 수 있다.
추가적으로 파라미터를 설정하려면
DECLARE_GLOBAL_SHADER(FTestShader);
SHADER_USE_PARAMETER_STRUCT(FTestShader, FGlobalShader);


class FTestShader_Perm_TEST : SHADER_PERMUTATION_INT("TEST", 1);
using FPermutationDomain = TShaderPermutationDomain<
	FTestShader_Perm_TEST
>;

BEGIN_SHADER_PARAMETER_STRUCT(FParameters, )
	/*
	* Here's where you define one or more of the input parameters for your shader.
	* Some examples:
	*/
	// SHADER_PARAMETER(uint32, MyUint32) // On the shader side: uint32 MyUint32;
	// SHADER_PARAMETER(FVector3f, MyVector) // On the shader side: float3 MyVector;

	// SHADER_PARAMETER_TEXTURE(Texture2D, MyTexture) // On the shader side: Texture2D<float4> MyTexture; (float4 should be whatever you expect each pixel in the texture to be, in this case float4(R,G,B,A) for 4 channels)
	// SHADER_PARAMETER_SAMPLER(SamplerState, MyTextureSampler) // On the shader side: SamplerState MySampler; // CPP side: TStaticSamplerState<ESamplerFilter::SF_Bilinear>::GetRHI();

	// SHADER_PARAMETER_ARRAY(float, MyFloatArray, [3]) // On the shader side: float MyFloatArray[3];

	// SHADER_PARAMETER_UAV(RWTexture2D<FVector4f>, MyTextureUAV) // On the shader side: RWTexture2D<float4> MyTextureUAV;
	// SHADER_PARAMETER_UAV(RWStructuredBuffer<FMyCustomStruct>, MyCustomStructs) // On the shader side: RWStructuredBuffer<FMyCustomStruct> MyCustomStructs;
	// SHADER_PARAMETER_UAV(RWBuffer<FMyCustomStruct>, MyCustomStructs) // On the shader side: RWBuffer<FMyCustomStruct> MyCustomStructs;

	// SHADER_PARAMETER_SRV(StructuredBuffer<FMyCustomStruct>, MyCustomStructs) // On the shader side: StructuredBuffer<FMyCustomStruct> MyCustomStructs;
	// SHADER_PARAMETER_SRV(Buffer<FMyCustomStruct>, MyCustomStructs) // On the shader side: Buffer<FMyCustomStruct> MyCustomStructs;
	// SHADER_PARAMETER_SRV(Texture2D<FVector4f>, MyReadOnlyTexture) // On the shader side: Texture2D<float4> MyReadOnlyTexture;

	// SHADER_PARAMETER_STRUCT_REF(FMyCustomStruct, MyCustomStruct)

	SHADER_PARAMETER(float, fAddVal) // On the shader side: float fAddVal;
	SHADER_PARAMETER_RDG_TEXTURE_UAV(RWTexture2D, RenderTarget)


END_SHADER_PARAMETER_STRUCT()
이부분에서 (타입,이름)형식으로 선언해주고,
float fAddVal;이런식으로 usf파일에 선언해주면 해당 값을 인풋으로 받을 수 있다.
#include "/Engine/Public/Platform.ush"

float fAddVal;

RWTexture2D<float3> RenderTarget;

[numthreads(THREADS_X, THREADS_Y, THREADS_Z)]
void TestShader(
	uint3 DispatchThreadId : SV_DispatchThreadID,
	uint3 groupThread : SV_GroupThreadID )
{
    float groupU = fAddVal;
    float groupV = fAddVal;
    RenderTarget[DispatchThreadId.xy] = float3(groupU, groupV, 0.0);
}
이렇게 수정한 셰이더와
		if (bIsShaderValid) {
			FTestShader::FParameters* PassParameters = GraphBuilder.AllocParameters<FTestShader::FParameters>();

			PassParameters->fAddVal = 10.0f;
이렇게 설정을 해주고 실행을 하게 되면

이런식으로 설정되어 값이 나오는 것을 볼 수 있다.
값을 10으로 설정해서 완전 노란색으로 보이는데 만약 이 값을 0.5로 수정하고, x,z에 할당하면
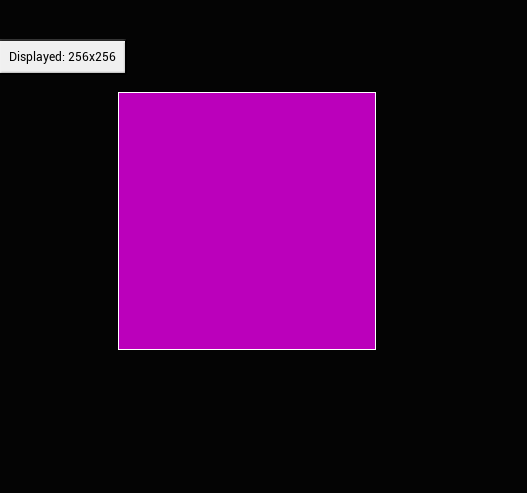
이런식으로 Render Target에 정상적으로 표현되는 것을 볼 수 있다.
	static bool ShouldCompilePermutation(const FGlobalShaderPermutationParameters& Parameters)
	{
		const FPermutationDomain PermutationVector(Parameters.PermutationId);

		return true;
	}

	static void ModifyCompilationEnvironment(const FGlobalShaderPermutationParameters& Parameters, FShaderCompilerEnvironment& OutEnvironment)
	{
		FGlobalShader::ModifyCompilationEnvironment(Parameters, OutEnvironment);

		const FPermutationDomain PermutationVector(Parameters.PermutationId);

		/*
		* Here you define constants that can be used statically in the shader code.
		* Example:
		*/
		// OutEnvironment.SetDefine(TEXT("MY_CUSTOM_CONST"), TEXT("1"));

		/*
		* These defines are used in the thread count section of our shader
		*/
		OutEnvironment.SetDefine(TEXT("THREADS_X"), NUM_THREADS_TestShader_X);
		OutEnvironment.SetDefine(TEXT("THREADS_Y"), NUM_THREADS_TestShader_Y);
		OutEnvironment.SetDefine(TEXT("THREADS_Z"), NUM_THREADS_TestShader_Z);

		// This shader must support typed UAV load and we are testing if it is supported at runtime using RHIIsTypedUAVLoadSupported
		//OutEnvironment.CompilerFlags.Add(CFLAG_AllowTypedUAVLoads);

		// FForwardLightingParameters::ModifyCompilationEnvironment(Parameters.Platform, OutEnvironment);
	}
private:
};
상단 코드는 Permutation 벡터를 수정할 수 있다는데 이건 좀 더 알아봐야 할 것 같고,
아래 코드는 상수를 설정할 수 있는 부분이다.
#pragma once

#include "CoreMinimal.h"
#include "TestPlugin/Public/TestPlugin.h"
#include "MeshPassProcessor.h"
#include "RHICommandList.h"
#include "RenderGraphBuilder.h"
#include "RenderTargetPool.h"
#include "MeshMaterialShader.h"
#include "ShaderParameterUtils.h"
#include "RHIStaticStates.h"
#include "Shader.h"
#include "RHI.h"
#include "GlobalShader.h"
#include "RenderGraphUtils.h"
#include "ShaderParameterStruct.h"
#include "UniformBuffer.h"
#include "RHICommandList.h"
#include "ShaderCompilerCore.h"
#include "EngineDefines.h"
#include "RendererInterface.h"
#include "RenderResource.h"
#include "RenderGraphResources.h"

#include "RenderGraphResources.h"
#include "Runtime/Engine/Classes/Engine/TextureRenderTarget2D.h"

#define NUM_THREADS_TestShader_X 32
#define NUM_THREADS_TestShader_Y 32
#define NUM_THREADS_TestShader_Z 1
TestShader.h에 가면 이렇게 상수를 선언하고있는데 이 값을 배정해줄 수 있다.
그래서 셰이더 내에서 정의하지 않은 값을 사용할 수 있었다.
다음 포스트에서는 이 Render Target을 Niagara에서 받아오는 것을 해보도록 하겠다.
'언리얼 > Unreal SPH 시뮬레이션' 카테고리의 다른 글
| 언리얼 유체 시뮬레이션 과정 5-1 - Vector Array를 이용한 나이아가라 시스템 데이터 이동 (0) | 2024.11.26 |
|---|---|
| 언리얼 유체 시뮬레이션 과정 4-1 - Render Target을 이용한 나이아가라 시스템 데이터 이동- Render Target 전달 (0) | 2024.11.12 |
| 언리얼 유체 시뮬레이션 과정 3-1 - Shadeup을 이용한 Unreal Compute Shader 구현 및 이해 - 셰이더 (0) | 2024.11.04 |
| 언리얼 유체 시뮬레이션 과정 2 - 컴퓨트 셰이더 세팅 (0) | 2024.11.04 |
| 언리얼 유체 시뮬레이션 과정 1 - 언리얼 프로젝트를 C++로 전환 및 Visual Studio For Unreal 셋업 (0) | 2024.11.03 |


